Varnish and Overpaint Removal: The Treatment of Benjamin Franklin
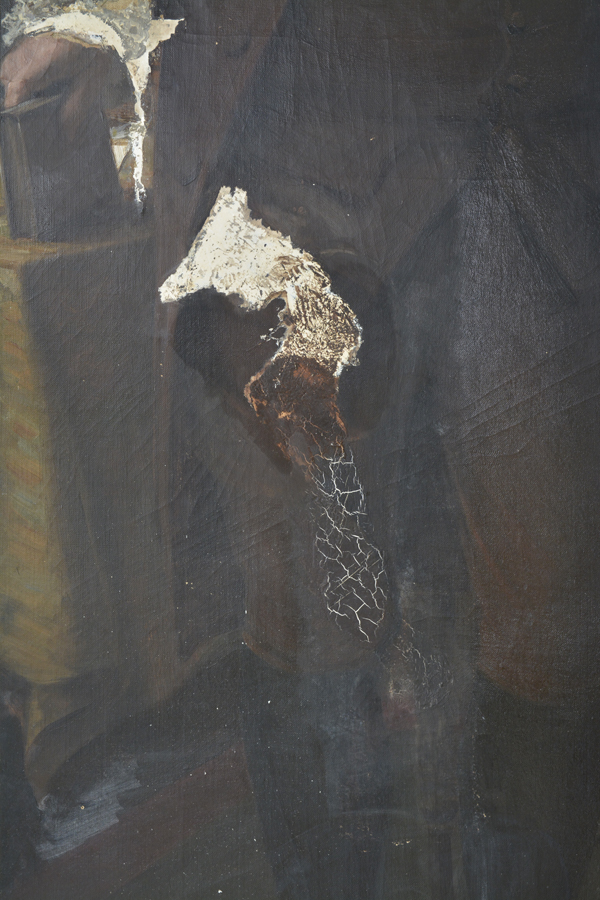
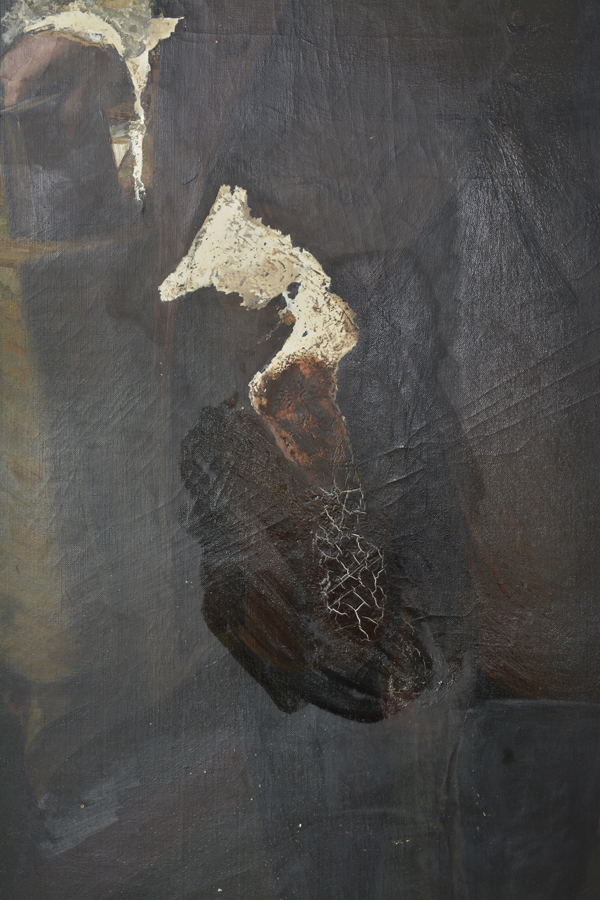
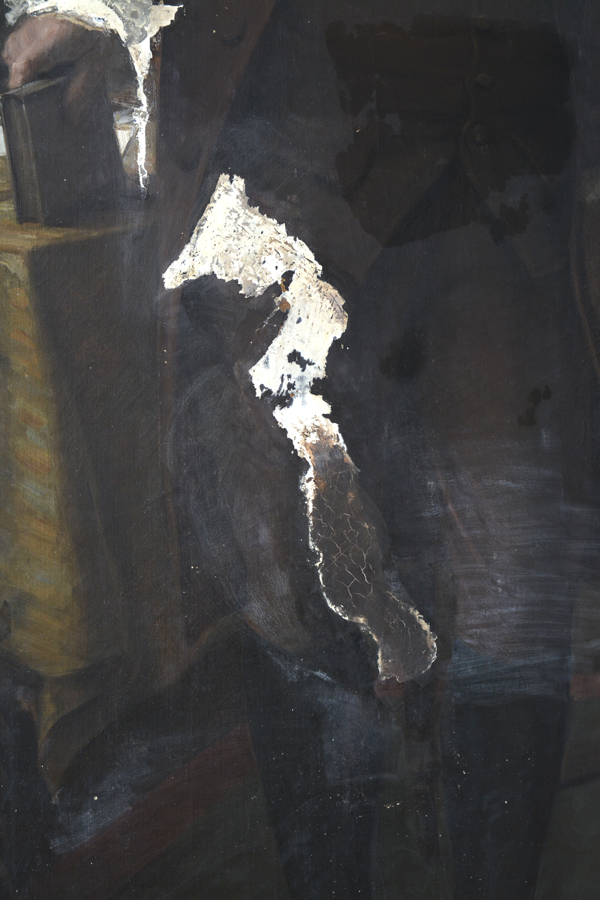
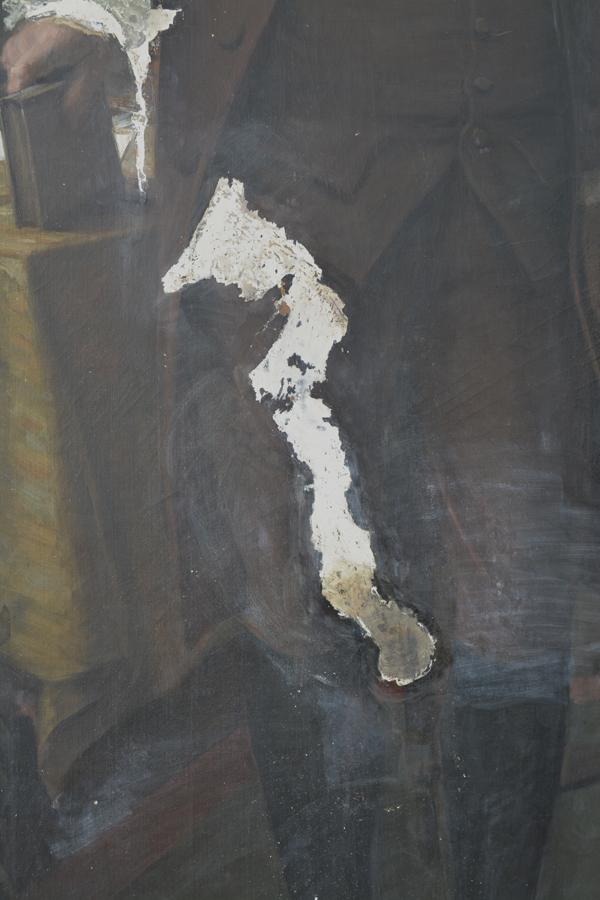
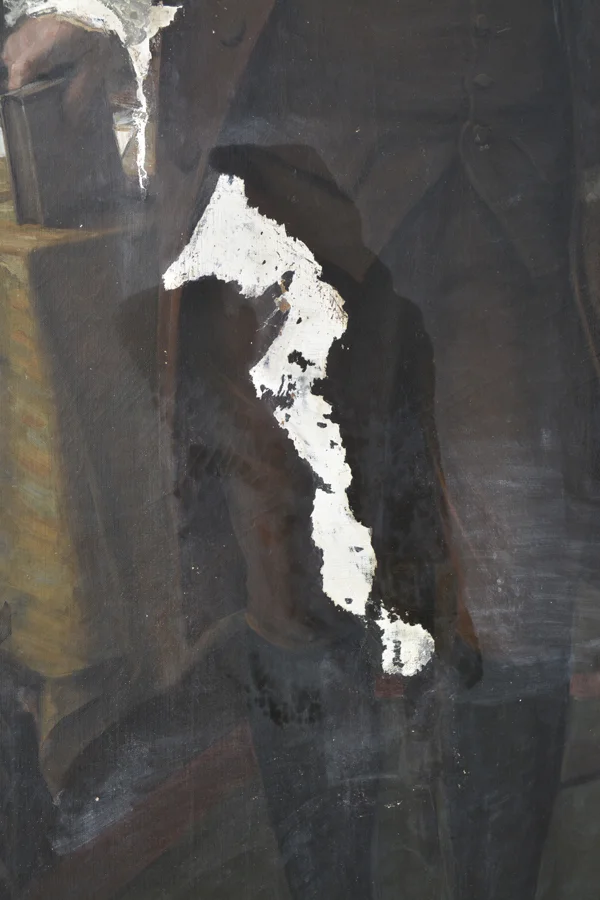
The cleaning of the discolored natural resin varnish revealed many areas of overpaint. As seen in the previous post, the areas were visible under ultraviolet radiation, aiding in their detection. Luckily, the overpaint removed in the same solvent solution used to clean the natural resin varnish. Unluckily, the old fills had been applied rather judiciously and required mechanical reduction. It was soon discovered that the large fills covered the original paint layer and islands of remaining paint were uncovered within the large fill in the thigh area.
This series of images was taken to document the removal of the overpaint and the reduction of the large fill: Click the photo to see the progression of the cleaning

Another area of loss was uncovered in Ben's right hand, just visible in the above images in the upper left corner. The previous restorer had filled in large losses without first relaxing the cupping and lifting paint. The fill required almost complete removal. The restorer had also taken some artistic license in recreating the frills of Ben's shirt and added frill to the top edge to help mask the revision. See below for before (left) and during overpaint and fill reduction (right). Note: The right side of the quill laying on the table has been revealed during the cleaning process.


Here is an overall view of Ben before (left) and during treatment (right). The white areas are what remains of the old fill material. Following overpaint removal, the fills were pared down to match the level of the original paint layer and many areas of original paint were revealed during the process. While the painting is naturally dark, the varnish removal and overpaint removal has greatly enhanced the aesthetics, clarity, and depth of the portrait. I look forward to sharing the inpainting process with you!

