Relax, Everything will be Bouquet.

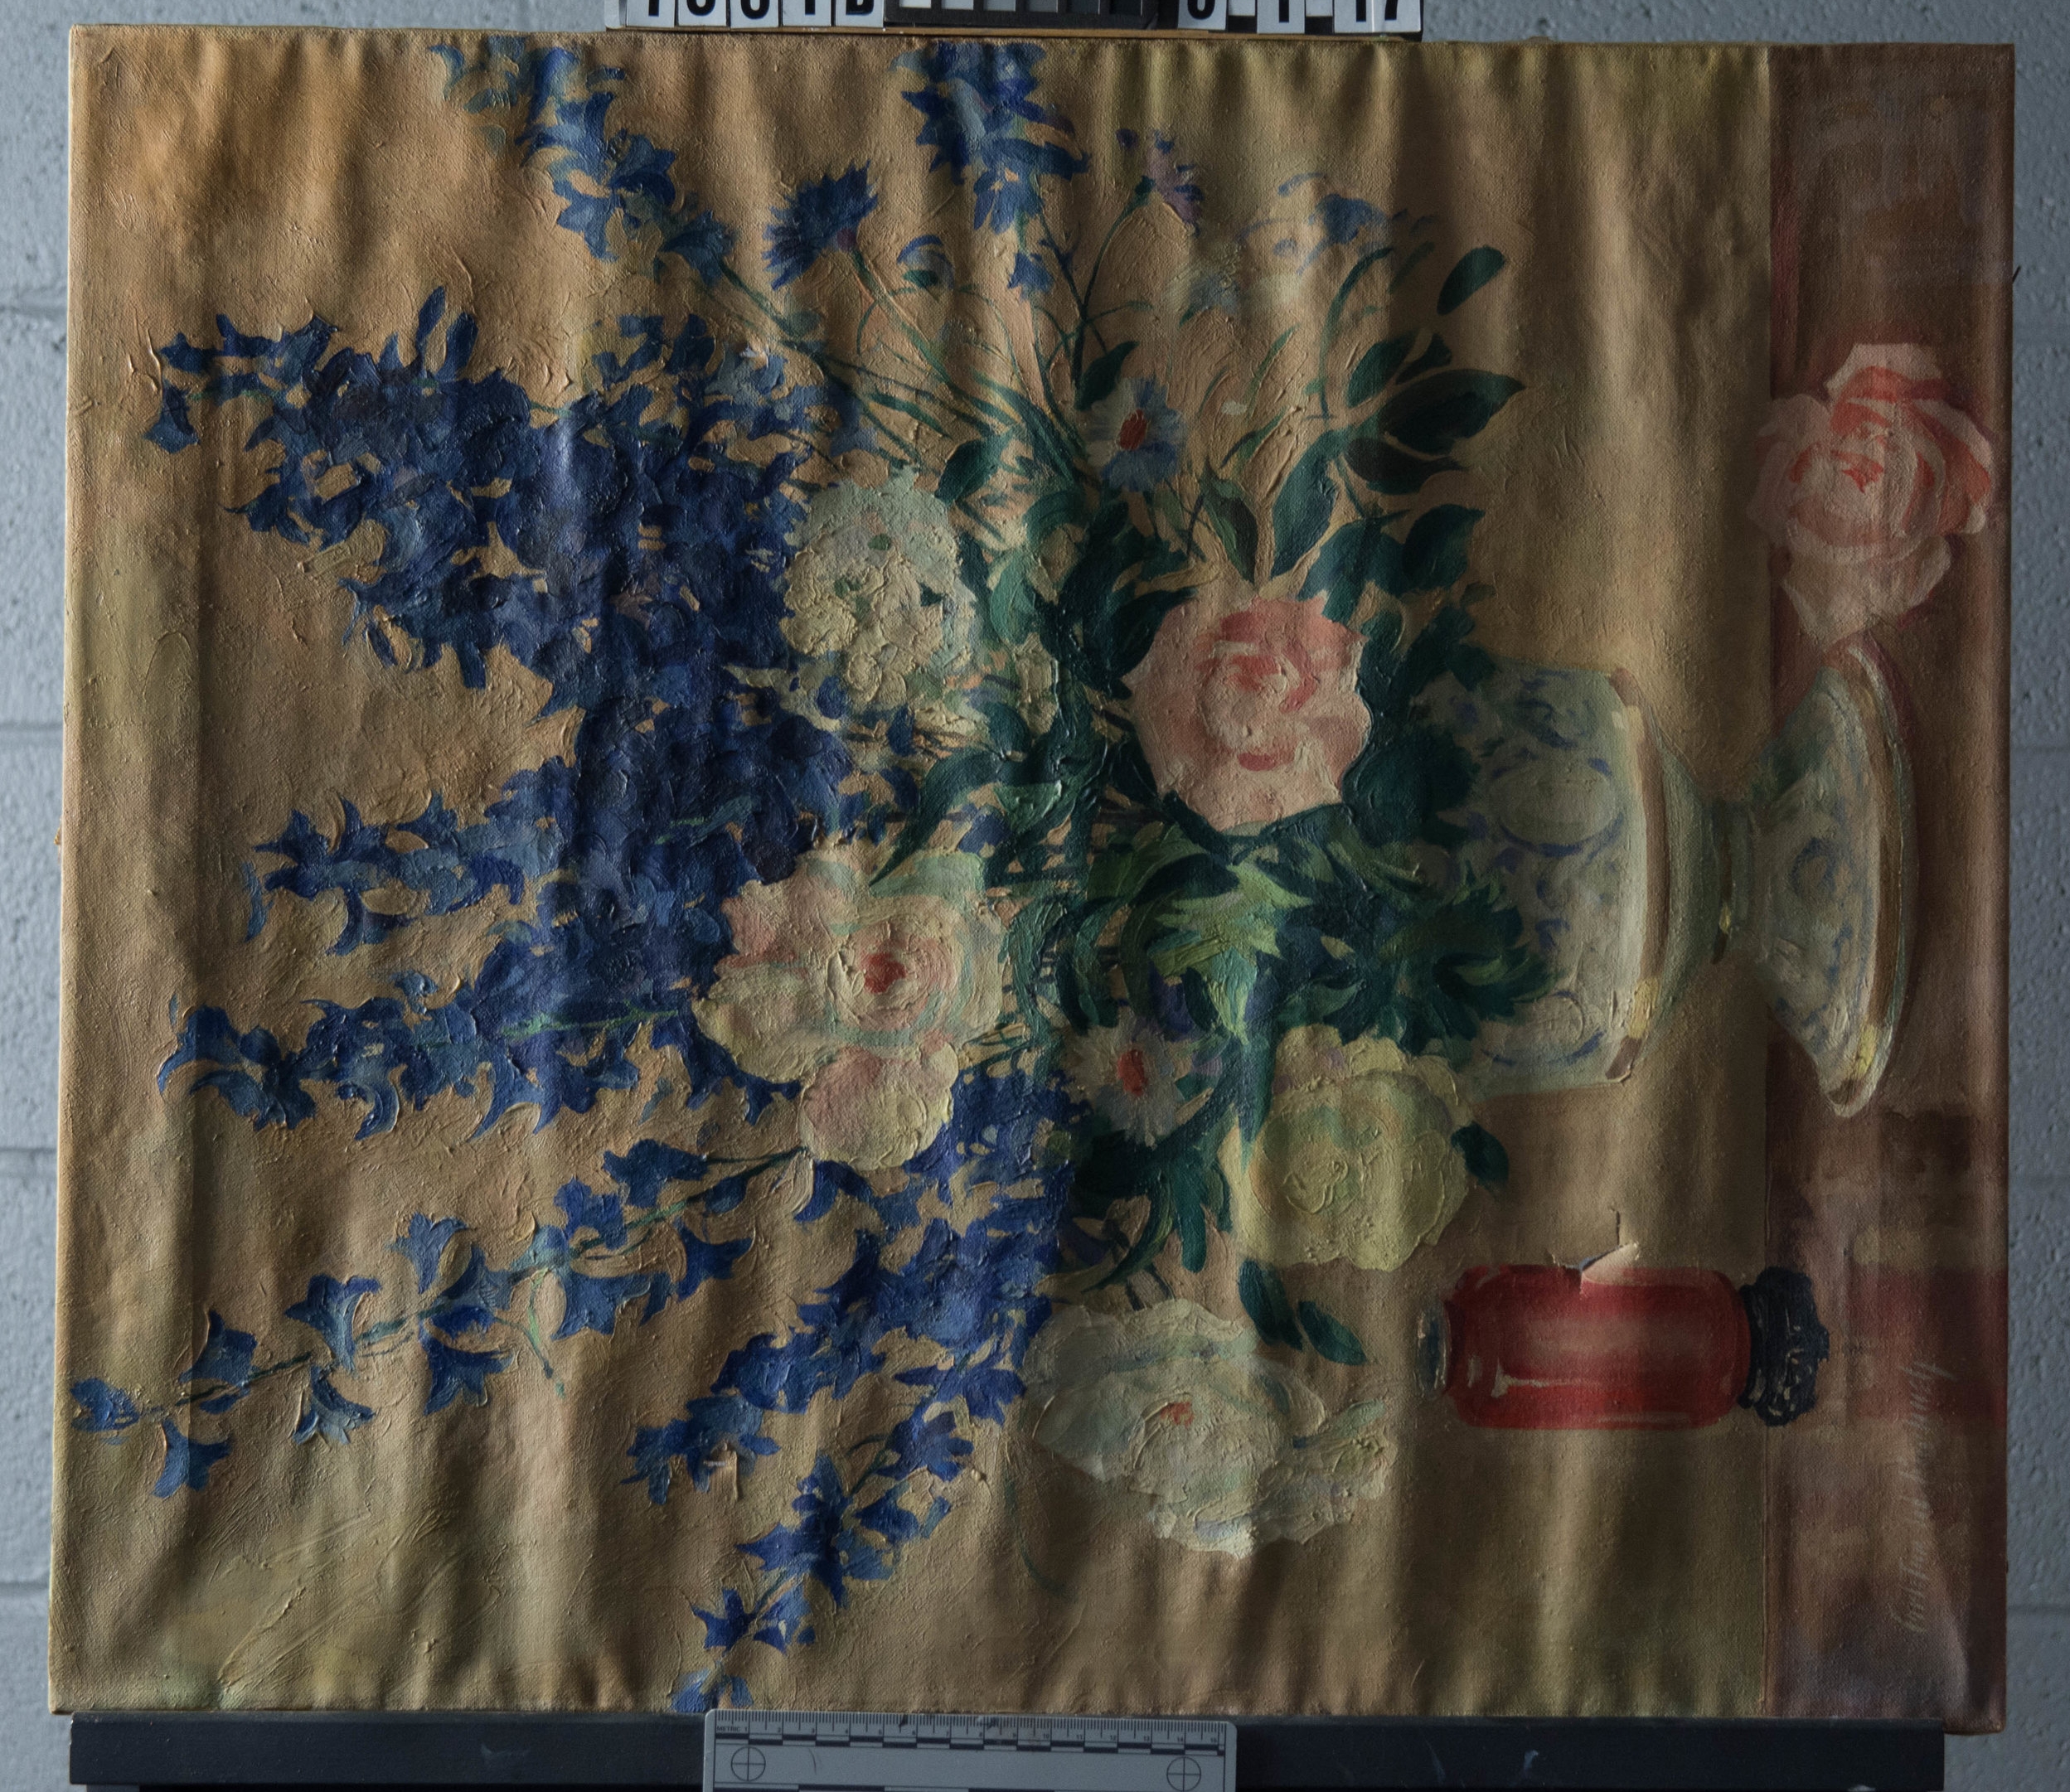
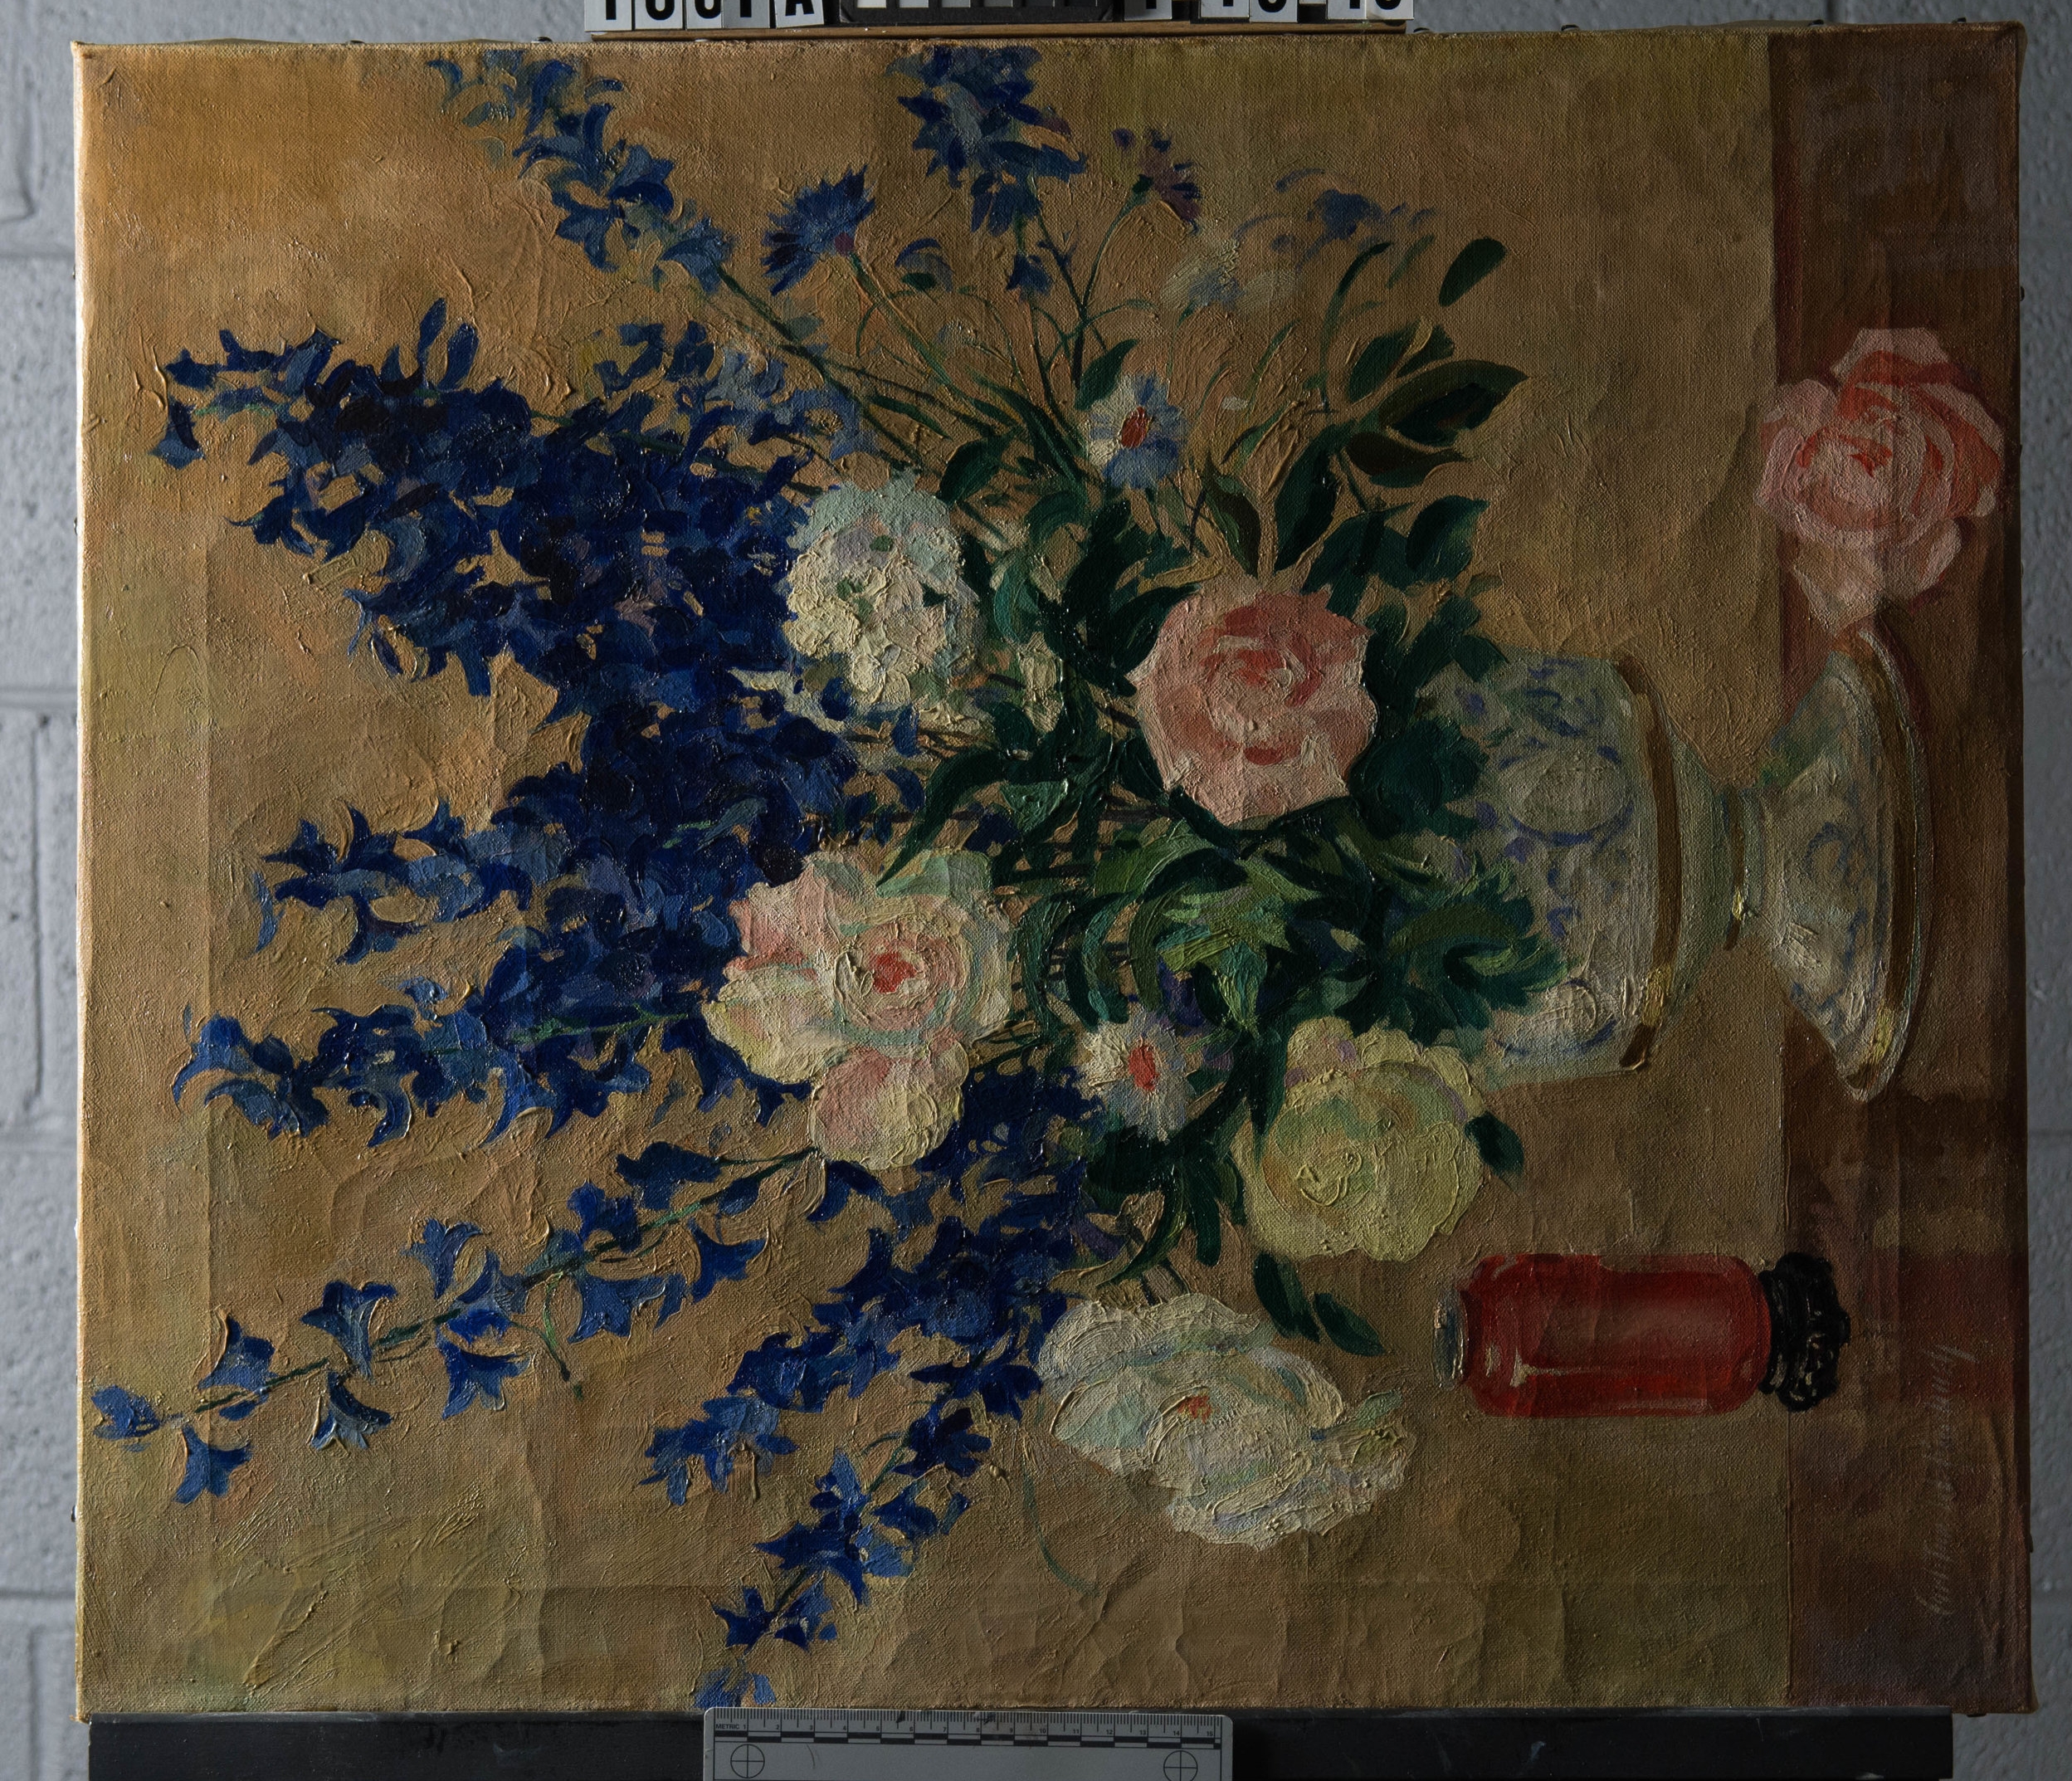
During conservation treatment, it is our practice that all structural work (work pertaining to the support) should be addressed before cleaning and other aesthetic work.  This painting, Still Life by Carl Furbush, exhibited dramatic planar distortions (undulations) of its canvas support likely due to previous rolled housing prior to stretching.  A raking light shot is used to document any deformations of the canvas and/or media.  In this case, the light was situated along the top edge of the canvas to emphasize the strong horizontal creases and undulations.

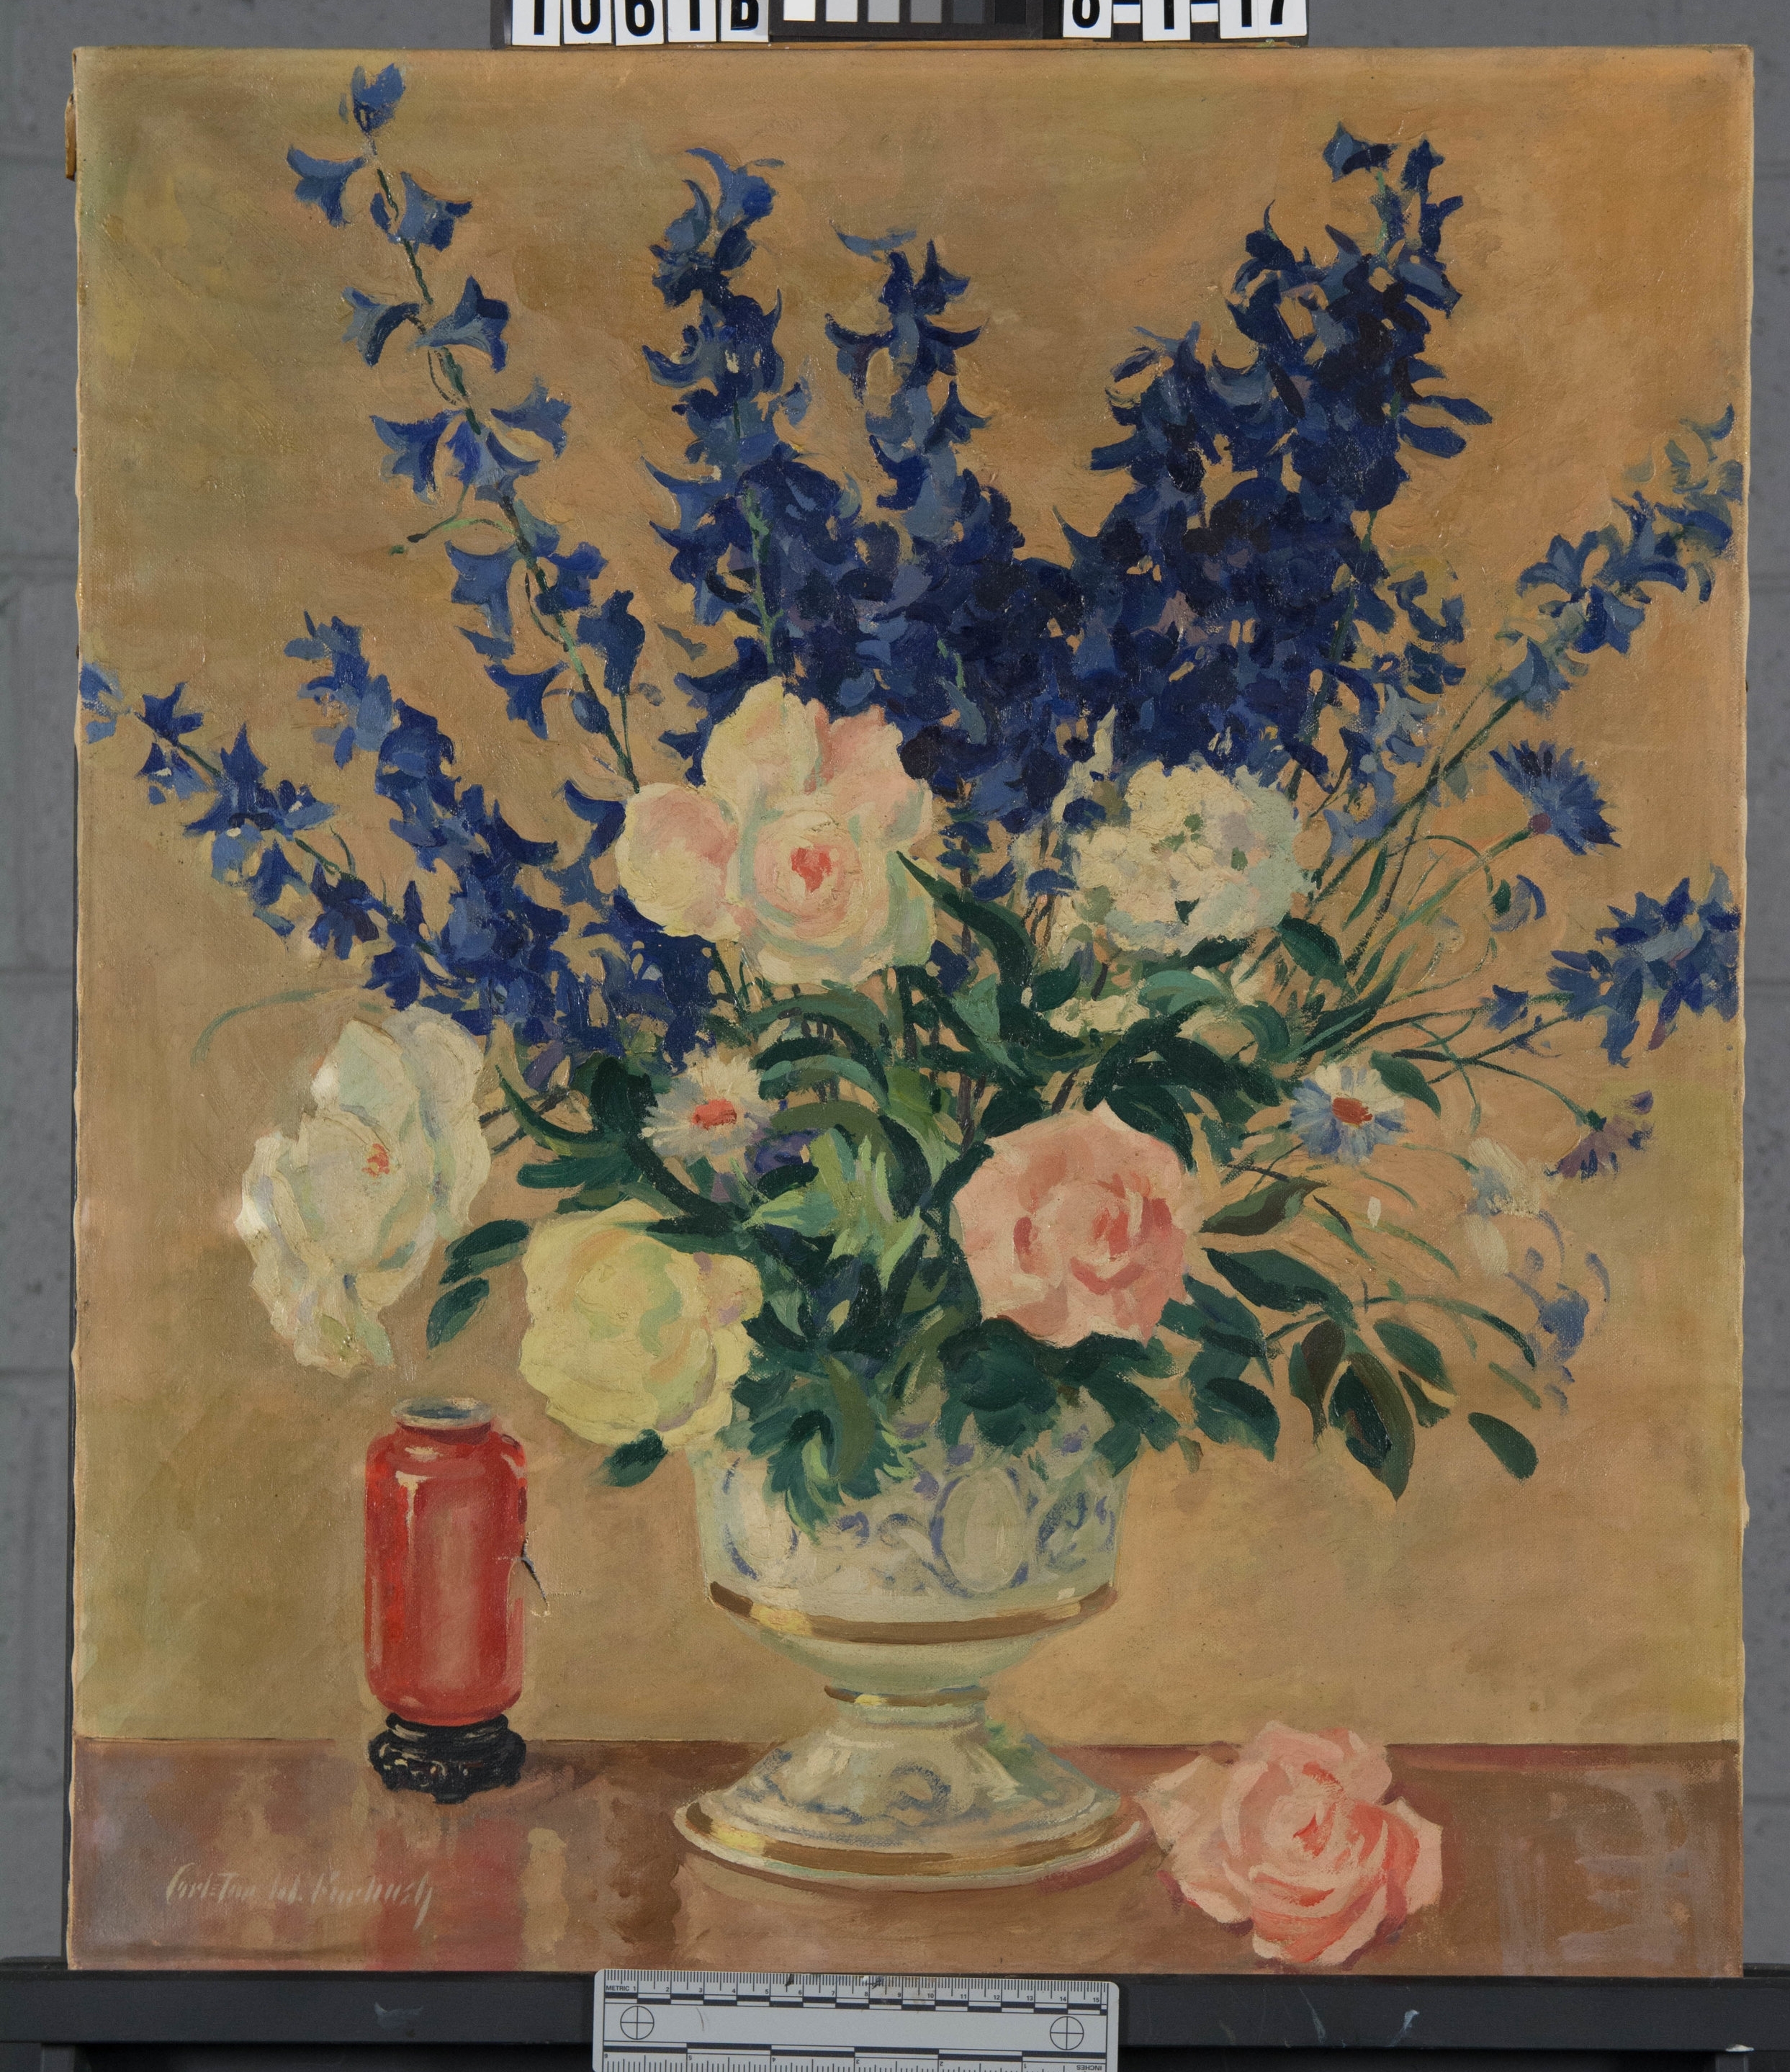
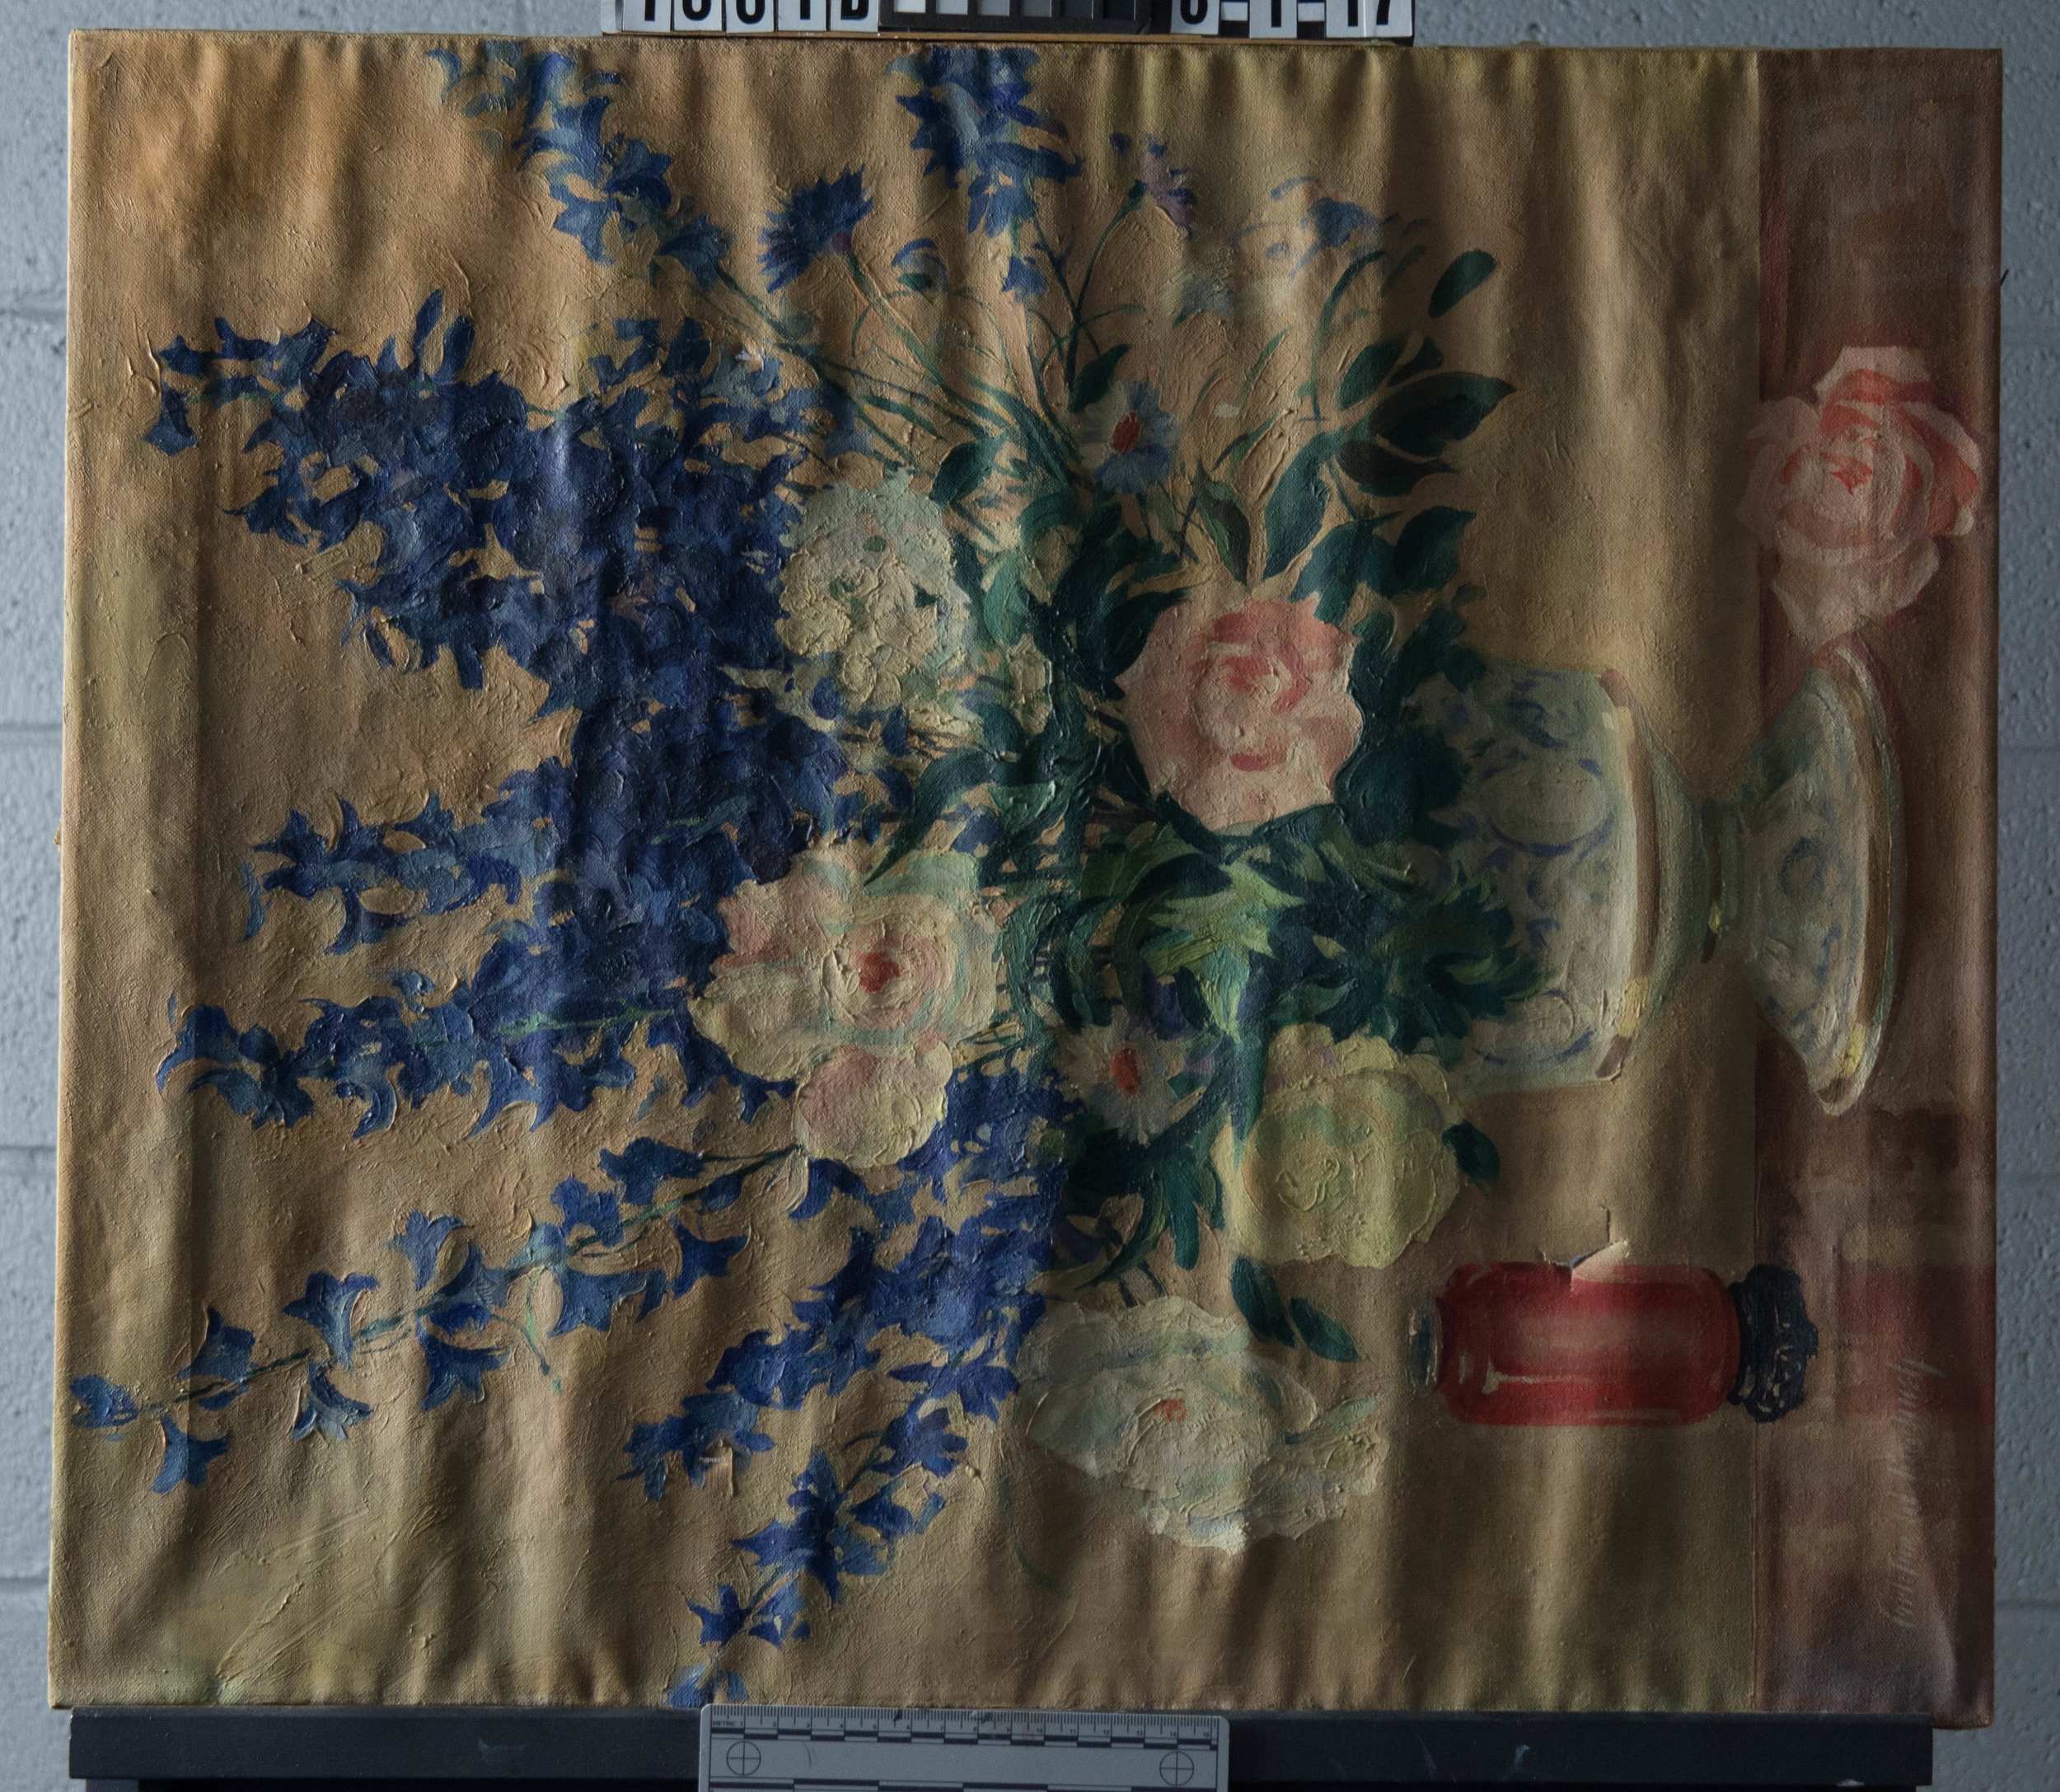
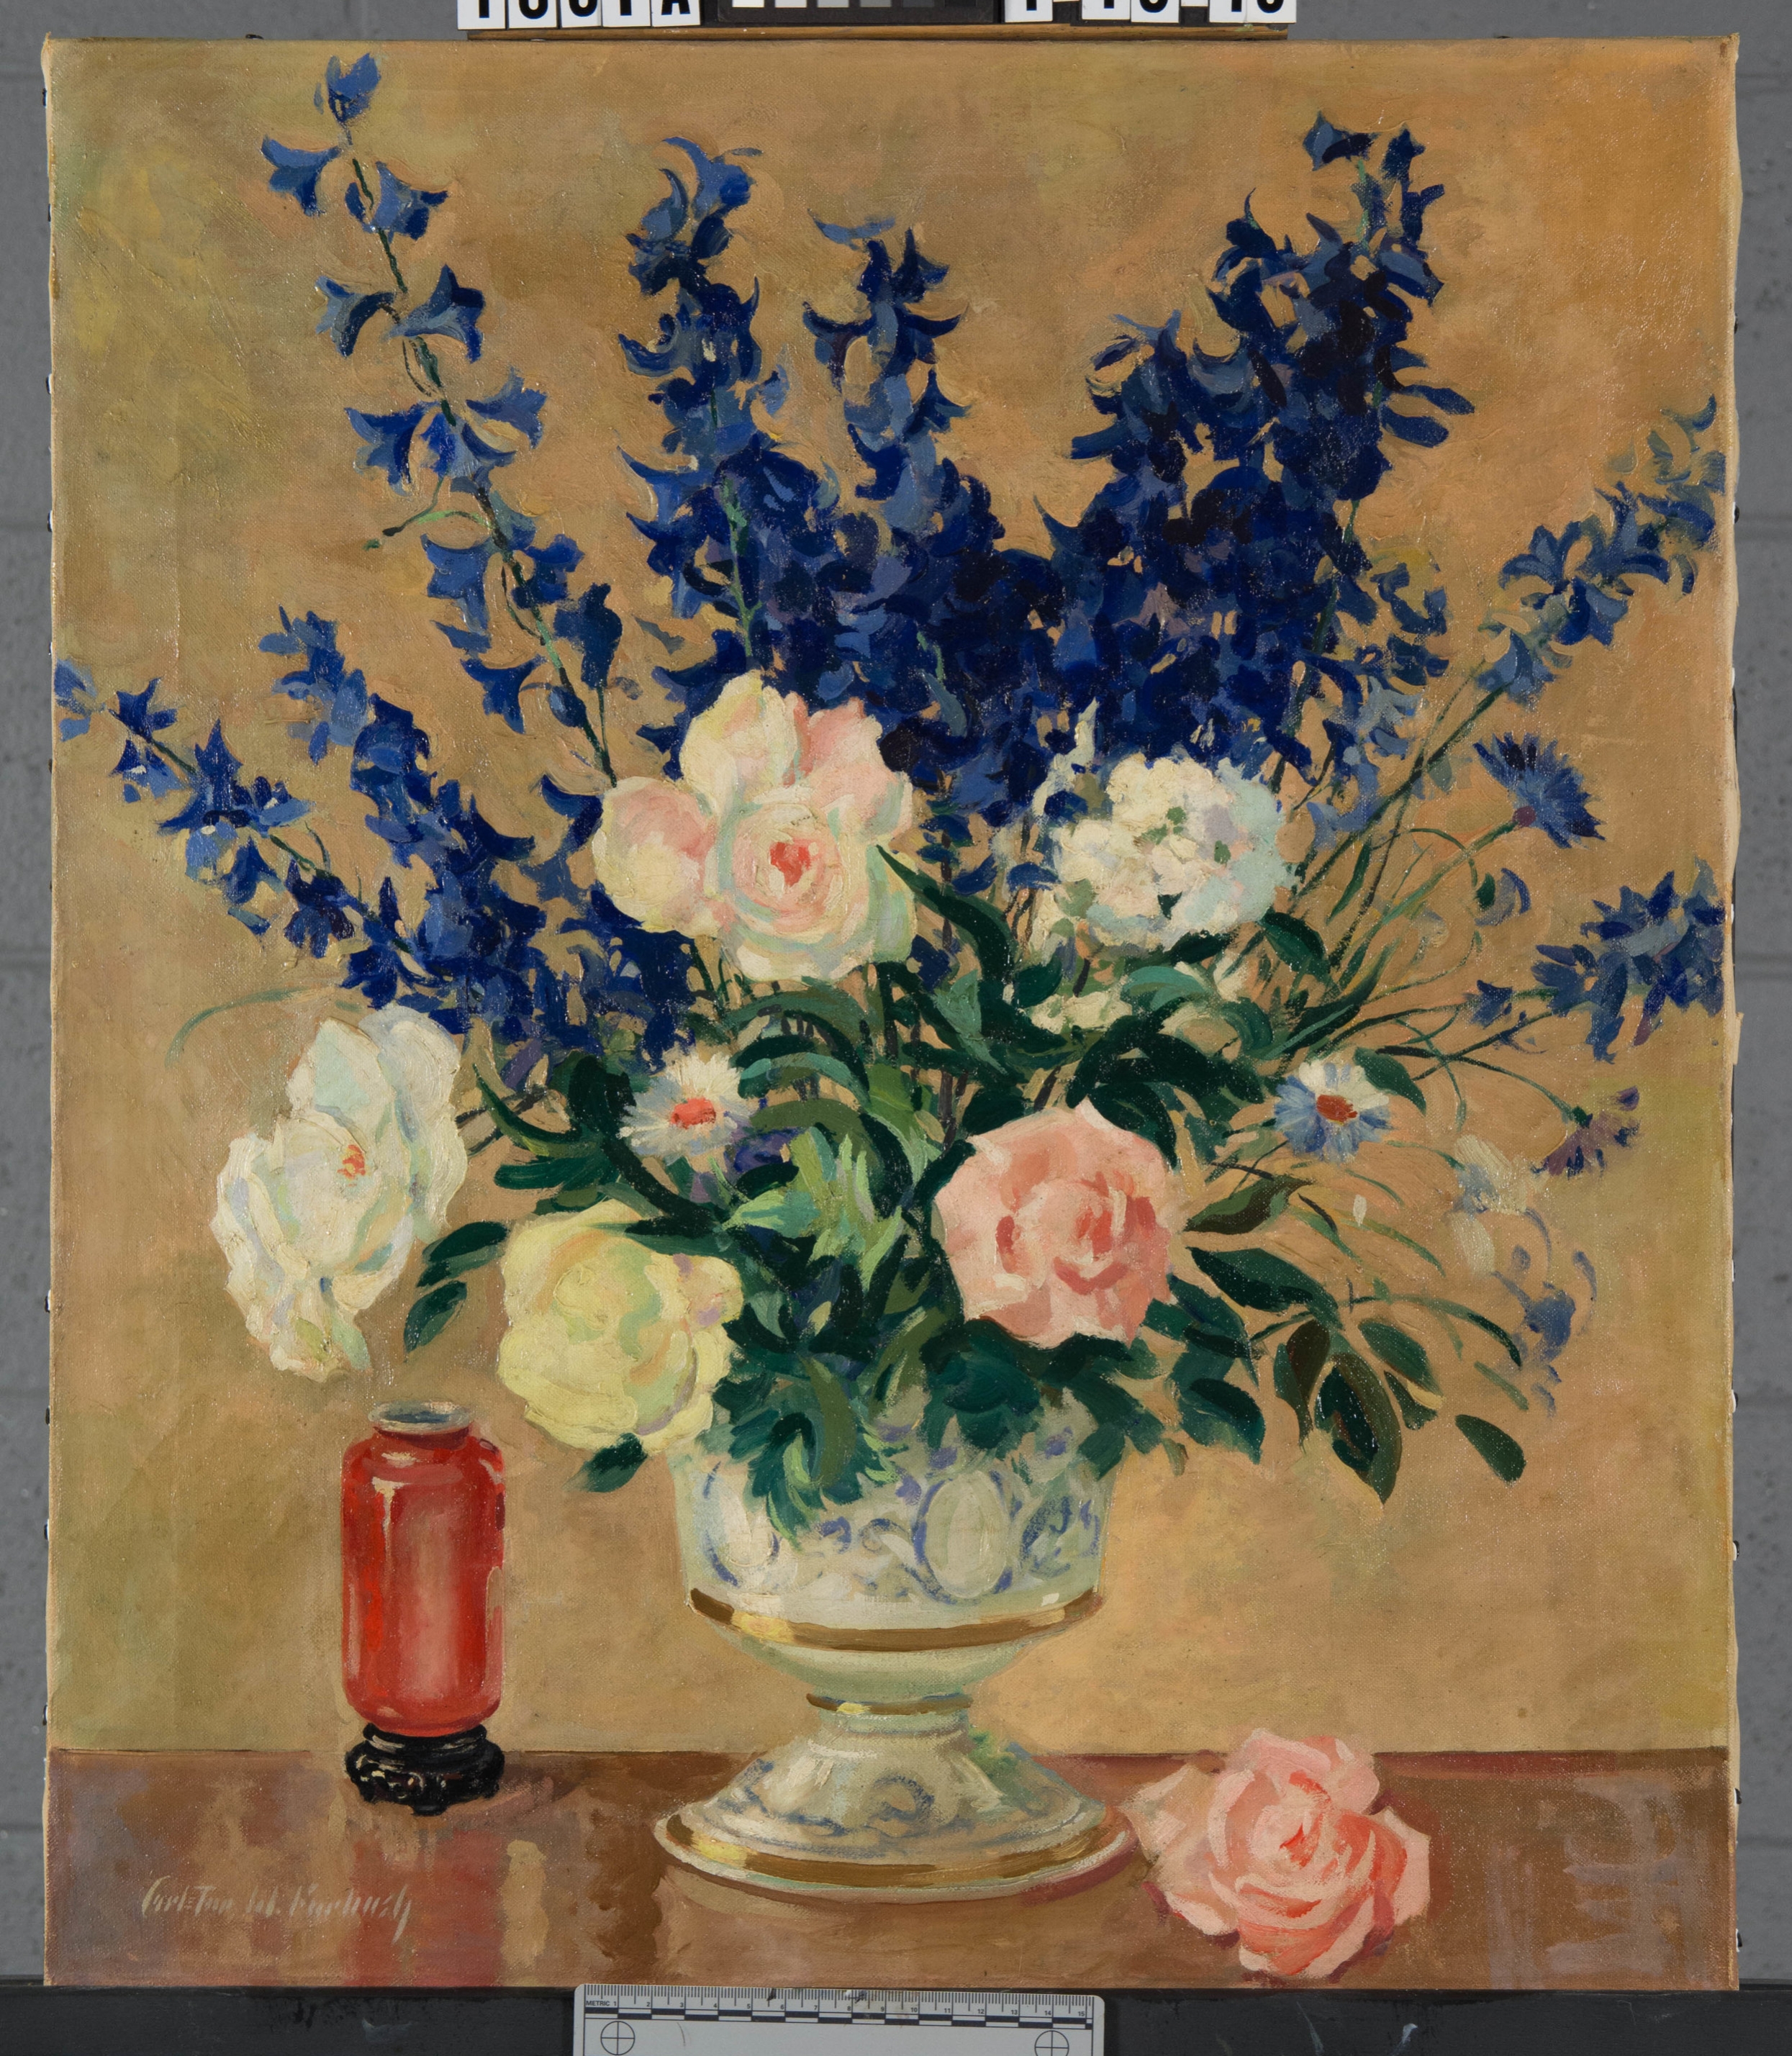
In order to relax the strong undulations of the canvas, the painting was un-stretched and was humidified on a heat/suction table to evenly relax the entire length of the canvas. Following the humidification treatment, the painting was re-stretched and the surface was cleaned of a heavy grime layer. Click on the arrows of the slideshow beneath to see the finished treatment!

A family together again

Grust, Family Scene, Before Treatment, Normal Illumination

Sometimes mishaps occur. Aged canvases can be exceptionally brittle, and when a fall or impact occurs, the result is usually a wide, gaping tear. The canvas fibers are pulled in the process and distortion occurs to the area of damage. The treatment of this fireside scene by F.G. Grust (1859 - 1909) illustrates how seemingly disastrous damages can be repaired. The painting took a fall and hit a chair, resulting in a large, L-shaped tear in the center and a small, C-shaped tear on the left side. The impact to the center caused the torn canvas to fold, resulting in a sharp crease and loss to the paint layers. The two details below show the major areas of damage.

The tears were first locally humidified to reduce the distortion of the canvas and strong crease. The painting was then removed from the stretcher and applied to a working strainer. A working strainer allows for complete access to the reverse, for overall humidification treatments and mending. The painting exhibited major distortions to the canvas, with some areas appearing to pre-date the damage. Seen at an oblique angle, the distortions are visible in this before-treatment image.

_DSC7707.JPG

While on the working strainer, the painting was completely humidified on a heat/suction table to reduce the planar distortions. In this process, the painting is placed face-up on the surface of the table. A thin film is used on the surface, with weights applied to the edges, to supply a seal for the vacuum cups. Suction is pulled through small holes cut into the film layer.  Once the humidified painting is completely dry, the suction can be removed.

After the painting canvas and tear were adequately planar, the painting was re-stretched, and the two tears were mended by joining the broken ends of the canvas using a combination of wheat starch paste and sturgeon glue. Losses in the paint layer were filled, and the paint layer was then cleaned of dirt and discolored varnish. The first image below shows the painting on its working strainer, during the overall humidification process on the heat/suction table. The second image shows the painting following cleaning and ready for inpainting.

Before inpainting, the surface must be re-saturated with a varnish layer.  Inpainting is undertaken using pigments bound in a synthetic resin, as to ensure its reversibility, should the need arise. The treatment briefly described here, though complicated, was extremely rewarding. The great details found in the charming family scene can now be fully enjoyed. The images below illustrate the painting before and after treatment.

*All images are courtesy of the owner. Please do not reproduce or use the images without permission.

Team work! Local conservators join together to treat Maxo Vanka's murals in the Church of Saint Nicholas in Millvale.

I have had the great pleasure of joining a team of local conservators in the Pittsburgh area to work on the murals of Maxo Vanka at the St. Nicholas Croatian Church in Millvale, located just a bridge away from the city of Pittsburgh.  Members of the conservation team include:  Patricia Buss, Teresa Duff, Cynthia Fiorini, and Rhonda Wozniak.  Rikke Foulke, head conservator of the team, has already successfully treated 10 of the murals in the church for a variety of condition issues, with the most intrusive being salt formation due to moisture in the plaster walls.  The salts have crystallized on the surface and behind the painted murals, causing paint loss and white encrustations on the surface.  The murals currently being treated are located on the ceiling underneath the choir loft.  Salt formations have not occurred as of yet, but the murals exhibit extensive instability and scattered areas of loss due to their location over the entrance doors and radiators. 

Image courtesy of Clear Story Creative

Image courtesy of Clear Story Creative

Image courtesy of Clear Story Creative

Image courtesy of Clear Story Creative

The mural presently undergoing treatment is featured above and depicts one of two battlefield scenes.  The imagery of the murals is both biblical in nature and reflects Maxo Vanka's pacifist stance during the first World War.  The images also reflect his enduring love for his motherland, Croatia, and many of the murals speak to the effects of war on the Croatian people and humanity in general.  The detailed image above depicts perhaps one of the more imposing images of the mural series, Justice.  Justice is depicted carrying scales, a sword, and is wearing a gas mask.  For more information on the murals' history and background info on Maxo Vanka, please visit the website of the The Society to Preserve the Millvale Murals of Maxo Vanka: http://vankamurals.org/maxo-vanka-life-work/.

As the work must be done on a scaffold to the ceiling, work is slow and methodical.  The unstable paint areas must first be consolidated (stabilized) with a dilute adhesive to prevent future paint loss.  The surface is then cleaned of black, sooty, surface dirt and inpainted using a reversible and stable medium to minimize the appearance of present losses. 

Image courtesy of Mindy McNaugher

Image courtesy of Mindy McNaugher

There is currently a Heinz Endowment challenge to raise funds to help conserve the murals and install proper lighting.  We hope to complete the conservation of the battlefield murals by next year.  Check out the main donation website here: http://vankamurals.org/battlefields-campaign/ and click the button beneath to be directed.

A New Life for Civil War Veteran AP Burchfield

Alba Art Conservation was honored to be chosen for the treatment of a 1910 portrait of Civil War veteran AP Burchfield for the Soldiers and Sailors Memorial Hall and Museum.

The Soldiers and Sailors memorial hall "was built to recognize the sacrifice, valor and patriotism of the Civil War Veterans of Allegheny County, Pennsylvania". Today, the museum boasts an extensive collection of Civil War era materials and the Memorial honors men and women of all branches of the U.S. military. For information about this local institution please visit: http://soldiersandsailorshall.org/about-us/

Burchfield was a member of Company E, 123rd Pennsylvania Volunteer Regiment, enlisting on August 8th, 1862 in Allegheny City and was promoted to sergeant on April 10th, 1863.  Following the war, Burchfield was the first president of the Memorial Association, who conceived of the memorial hall and its construction.  He died before the official opening of Soldiers and Sailors.  The opening ceremony is depicted in the photograph (right), where his portrait hangs as tribute. 

During the initial assessment of the painting, the portrait immediately stood out in the artist's attention to detail and careful modelling of the subject's face.  The general is depicted over a warm, deep earth colored background.  The warmth complements the natural rosiness to his face and contrasts the cool shadows that help create the three-dimensionality of the subject.

The painting exhibited two tears in the lower left corner, one straight and the other compound (branched).  The painting also exhibited a discolored, very oxidized varnish layer that had been applied to the surface while the painting was framed. 

The Soldiers and Sailors Memorial Hall in Pittsburgh,  PA.  Image courtesy of WESA.

The Soldiers and Sailors Memorial Hall in Pittsburgh,  PA.  Image courtesy of WESA.

The photograph was taken during the 1910 dedication ceremony on opening day.  A portrait of Burchfield is visible top, center.  Image courtesy of Soldiers & Sailors Memorial Hall and Museum


The before treatment image of Burchfield showing two tears in the lower left quadrant in addition to an exceptionally discolored varnish layer.

The image on the left (above) is a detail photograph of the two tears in the lower left quadrant.  The image on the right is a photograph taken under ultraviolet radiation.  Resin varnishes have a unique fluorescence when induced with ultraviolet radiation.  The area of non-fluorescence in the lower left corner indicates the beginning of the varnish removal.  His face is much less fluorescent than the surrounding area, suggesting a previous attempt to remove the varnish in the detailed facial area.  A non-florescent border visible around the perimeter indicates the area protected from the varnish application by the frame rabbet.

The treatment began with the stabilization, humidification and mending of the tears in the lower left corner. Once they were stabilized, the varnish removal could progress.

The highly oxidized varnish proved only slightly soluble to solvent solution and solvent gel solutions.  Mechanical removal proved to be the safest and most efficient way to remove the coating evenly and without damaging the paint beneath.  This type of removal was only possible due to a heavy layer of soot between the varnish and paint surface.  The soot allowed for delamination of the varnish as the dirt acted as a barrier layer. I need to emphasize to not try this at home as this is a unique case and attempts at mechanical varnish removal may result in great damage.  Much of the varnish removal proved to be exceptionally tedious and was done under a microscope, especially in the facial area where the varnish had been previously thinned.

This is a detail shot of the mechanical removal of the varnish layer. 

This is a detail shot of the mechanical removal of the varnish layer. 

Below is a during treatment shot of the portrait, with the varnish removed from the left half of the painting.  Suprisingly, the cleaning of the lower left quadrant revealed the artist's original signature.  "Charles Walz, 1910" was inscribed onto the surface using a sharp implement.

Following removal of the varnish, the remaining soot and varnish residues were cleaned from the surface and the painting and the losses associated with tears could be filled and inpainted. The painting was varnished with a reversible, light stabilized synthetic resin to regain the saturation of the dark colors in the coat and background.  The saturation of the portrait also renewed the artist intended contrasts between the figure and the background as well as the shadows in the subject's face.  The two images below show the painting before (left) and after (right) treatment. 

I am very happy with the results of the treatment and proud to be working with such a great local institution and Pittsburgh gem. The work was funded by a grant from the Mary Hillman Jennings Foundation (Hillman Family Foundation).  Thanks also to Michael Kraus, curator, for background information.

A little conservation CSI: UV examination

Conservators have various tools and techniques to aid in the examination of works of art.  A handy tool that is easy to transport and can capture a lot of information is a UV light.  Paintings can also be photographed under UV radiation to capture this information.  Natural resin varnishes display greenish florescence when viewed under UV radiation.  Retouching has a tendency to appear black (or non-florescent) next to natural resin varnishes.  The images of Leisser's Ben Franklin are in normal illumination (left) and under UV radiation (right). 

The during-treatment image shows two things:  The area that has already been cleaned of varnish and areas that exhibit overpainted damages - most notably the large damages on the subject's right thigh, right arm, and right hand.  The two images beneath show the same UV image with areas of cleaning/overpaint marked in red. The image on the left has a red line marking the area that has already been cleaned.  The image on the right has red circles to denote areas of old overpaint. 

The images are important because they show that the overpaint exceeds the boundaries of the damage beneath.  The previous restorer was heavy handed and attempted to hide the damage under a heavy layer of overpaint.  The next blog post in the series uncovers what is under those overpainted areas. 

The difference a varnish can make... (or a case for resaturation)

Aside from becoming yellowed and dark, a varnish can also become desaturated, imparting a very matte and generally obscured painted surface.  In many cases, where the original varnish cannot be removed, the varnish can be resaturated with the addition of a fresh coat.   This portrait of a Native American by Dunlap, 1914, is one such example.   The surface was obscured by a heavy layer of dirt and the varnish was uneven and matte. 

The new layer of varnish restored clarity and depth to the image without requiring old layers to be removed.  Other treatment steps undertaken include humidifying and flattening planar distortions, removing two lodged keys in the lower right corner, retouching wide aperture cracks, and mending a compound tear in the upper right corner.